BLOG
The 14 Steps Involved in Adding a Home Addition in Colorado

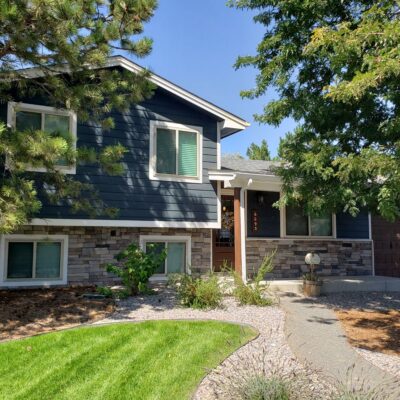
A home addition changes the floor plan and footprint of a home and is typically the most complicated home renovation project, since it requires foundations, framing, electrical and plumbing work and finishing to create a new living space. We’ve outlined the steps involved in adding a home addition to help you understand everything you need to consider before, during, and after the project is complete.
1. Define Your Goals
Why are you adding extra space to your home? Let your contractors know whether you plan to use it as a guest room, playroom for the kids, home office, or something else. Take advantage of the contractor’s experience to help you pinpoint the most efficient way to complete your project with the least possible disruption.
2. Determine the Budget and Scope
In some ways, a home addition is like building a house. It involves a lot of design, budgeting, permitting, contractors, subcontractors, and the construction process itself. It’s essential to know the size and scale of the work in advance.
It’s also important to be realistic about budgets. A full-scale, multi-room home addition usually runs in the low six figures – up to around $250,000 for a significant bumpout to expand or relocate a spacious kitchen.
3. Select a General Contractor (Preferably, One That Provides Design + Build Services)
General contractors often have a carpentry staff and regular specialty subcontractors to perform much of the work in a home addition. Most people prefer that, as the general contractor manages the overall project, and the homeowner only has to pay one vendor for the work of all parties involved.
Choosing the right general contractor can make all the difference. Take your time and do your research. Get recommendations from friends and relatives. Read reviews and testimonials. Interview prospective contractors about the scope and parameters of the project, timeframe, design issues, and cost-saving measurements.
General contractors typically keep 10-20% of the total project cost as their profit. Don’t be afraid to negotiate total pricing or do some of the finishing work yourself in exchange for a discount on their bid.
Finally, most general contractors will ask for one-third of the estimated project cost up front as a down payment, then another third about halfway to completion, and the balance once the project has been finished.
You may negotiate a different schedule with your contractor, but be sure to reserve at least 25 percent of the total project cost until after the final walkthrough, so that you have leverage if not satisfied.
4. Design/Create Your Plan
Your addition’s “look and feel” and how that meshes with the remainder of the house has to be addressed along with more technical aspects of the design. You want your new addition to look like a natural extension of your home, not something added on. Work with your contractor to ensure efficient use of space and a natural flow from one room to the next.
5. Obtain Permits and Prepare the Site
Your contractor will obtain the required building permits, which must be posted in a visible spot on your property. To prepare the site for building, earth-moving equipment will make the site level, and any obstructions, such as trees or fences, will be removed.
All of this will make your project progress more quickly and smoothly. After completing the project, the contractor will restore your landscape to an appropriate finished appearance.
6. Build the Foundation
Like a new house, most room additions require a full foundation. Depending on the design, the contractor will either excavate for a crawlspace or basement, add footers and foundation walls, or pour a concrete slab. It usually takes several days to dig, pour, and cure the foundation before the framing crew can begin their work.
7. Frame the Structure
The floors, walls, and roof are framed as soon as the foundation has finished curing. Your addition may be “stick-built,” with the framing crew building everything on site, or erected offsite and transported to your property.
Framing moves along quickly, often within a day or two of pouring the foundation, so the structure can be sheathed to protect it against the weather.
8. Add the Sheathing and Roofing
The sheathing is the placement of solid panels to enclose the walls, which are then covered in a wrap made from fiberglass. Roofs are often sheathed with plywood, which is then covered by shingles. The goal is to give the structure a good measure of weather-proofing and allow crews to continue their work under shelter.
9. Install Windows and Doors
New windows and doors are usually installed concurrently with (or just after) the roof. This keeps the structure weather-tight. Construction pros describe the building as “dried-in” (protected from the elements) after this stage. These items are usually stock materials ordered from the manufacturer or a local home store, they can be installed quickly and easily.
10. Rough-In the Electrical, Plumbing, and HVAC
Electrical, plumbing, heating/cooling ductwork, and wiring are next. Once installed, your room addition project will go on hold for at least a day or two while the crews wait for city inspectors to inspect the work. Until city inspectors approve, no further work can occur.
11. Add Insulation and Drywall
After inspections are done, insulation and drywall are installed. Insulation can range from fiberglass batts, to sprayed foam, to blown-in cellulose. Installing drywall involves multiple steps, including hanging the sheets, “mudding” the seams with a wet compound, and finally sanding them after they have dried. With steady work, insulation and drywall installation can be finished within a few days.
12. Finish the Interior (i.e. flooring, cabinetry, painting, etc.)
Next comes flooring and cabinetry installation, along with painting the ceilings and walls. These can be done in basically any order based on the availability of specialty contractors. For example, specialty finish carpenters usually install interior doors, door trim, baseboards, and windows.
13. Complete the Landscaping
As your room addition is nearing completion, the landscaping and structures removed to create easy access to the site will now be repaired. Often, this includes earth-moving equipment returning to the site to backfill the foundation and contour the yard.
Landscape contractors may arrive to lay down sod for a new lawn and to plant shrubs and trees. However, these are areas that homeowners often take on themselves to save money.
14. Complete the Punch List
“Punch list” is what contractors call a record of miscellaneous tasks that still need to be done. Most of these are finishing touches, such as ensuring that the tile grout has been sealed and the shower caulked.
Once the project is considered done and all items on the punch list have been addressed, the contractor and homeowner do a joint walkthrough to ensure the project has been completed to everyone’s satisfaction. At this point, the contractor issues a final balance bill to the homeowner for payment.
Let’s Get Started!
Since 2006, Prospect 30 Eight Construction has been building top-quality custom homes, home additions, and Accessory Dwelling Units (ADUs) throughout the Denver Metro Area and Jefferson County.